DDR Settings
Report parameters can be adjusted on the DDR Settings page. To open DDR Settings click on the settings icon in the right corner of the window. Configured settings will be used during the creation of the report.
The DDR settings page contains five tabs with different parameters to set up.
People and Crew
Crew members
On the People and Crew tab can be set up the main parameters of the crew. To view the list of participants of the crew click on the Crew Members tab. The new person can be added to the crew members list by clicking on Add Member button.
In the opened Add Crew Member modal window enter the employee ID or company name; select the crew for the member from the drop-down list, person name, and position of the member from the drop-down list. The crew and positions are customized on corresponding tabs. When the fields are filled, click on the Add Member button, and the new person will be added to the Crew Member list. To change existing members, click on the Edit button in the list; a modal window is opened to edit the parameters. The members can be removed from the list by clicking on the Delete icon next to the user.
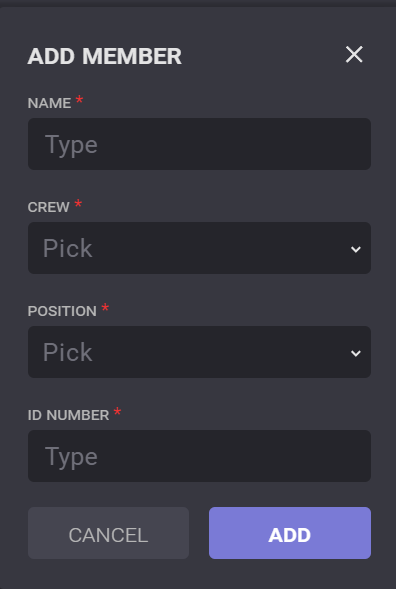
To find some users from the list put the cursor in the search field and enter the query. The list will be sorted with results that correspond to the entered query.
Crew Name
To open the list of the crews on the People and Crew tab, switch to the Crew Name. The list of the existing crews is presented in the table.
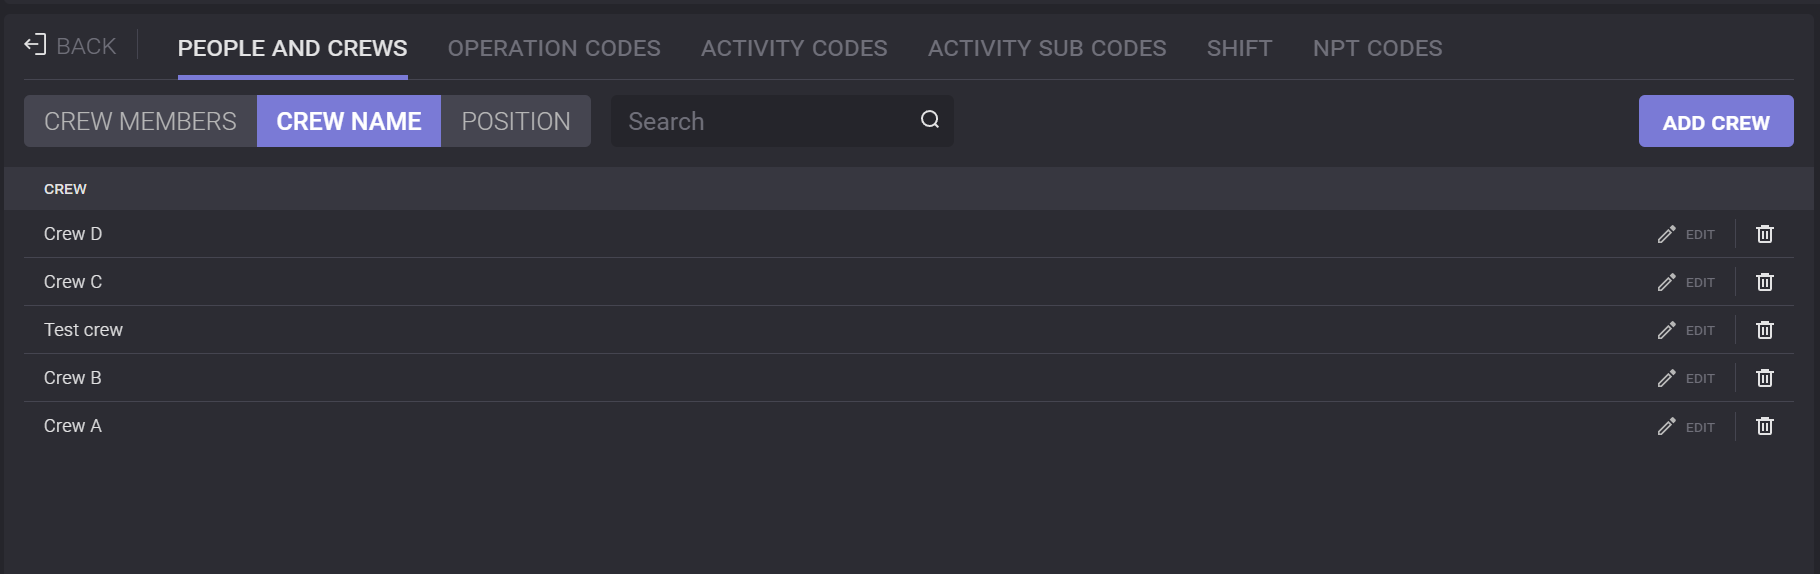
A new crew can be created by clicking on the Add Crew button. In the modal window enter the new crew’s name and click on Add button. The crew can be changed by clicking on the Edit button in the table.
To remove the crew from the list click on the Delete icon next to the necessary crew.
To find the crew in the list put the cursor in the search field and enter the query. The list will be sorted with results that correspond to the entered query.
Position
To open the positions list presented on the People and Crew tab, switch to the Position tab. The list of the job roles is presented in the table.
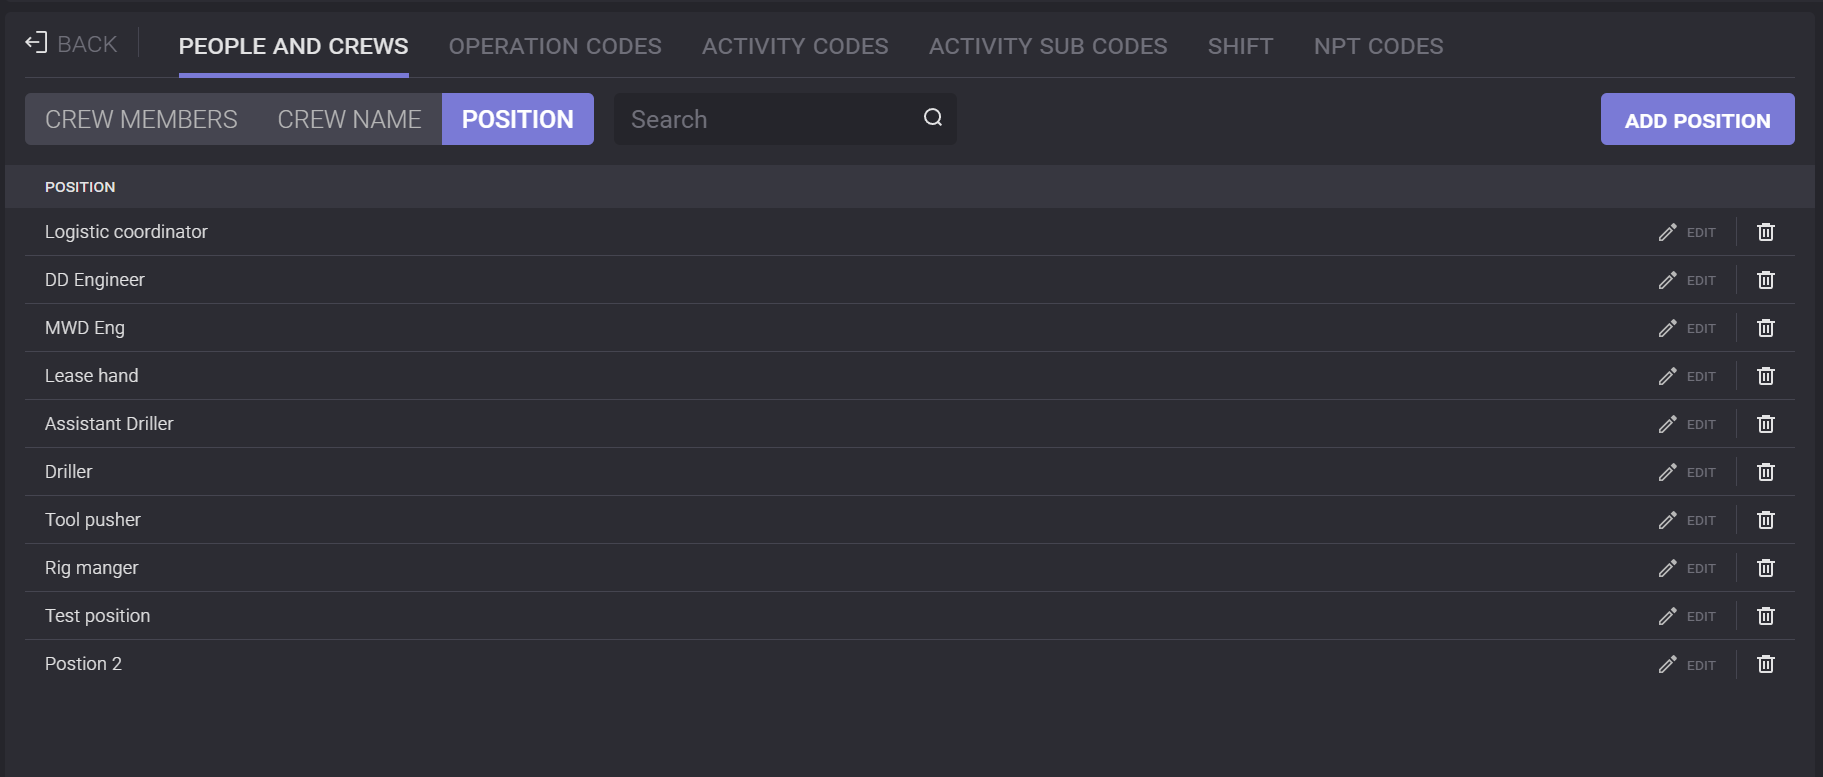
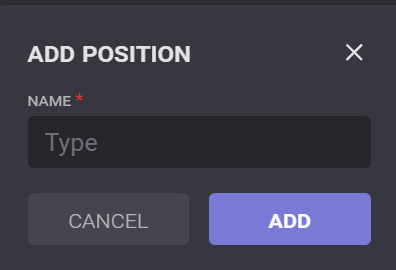
A new role can be created by clicking on the Add Position button. In the modal window, enter the new position title and click on the Add button. The position can be changed by clicking on the Edit button in the table.
To remove the position from the list, click on the Delete icon next to the necessary job role.
To find the position in the list, put the cursor in the search field and enter the query. The list will be sorted with results that correspond to the entered query.
Operation Codes
Operation codes can be adjusted in the DDR settings. To create the code, click on the Add Code button on the Operation Codes tab of the DDR settings.
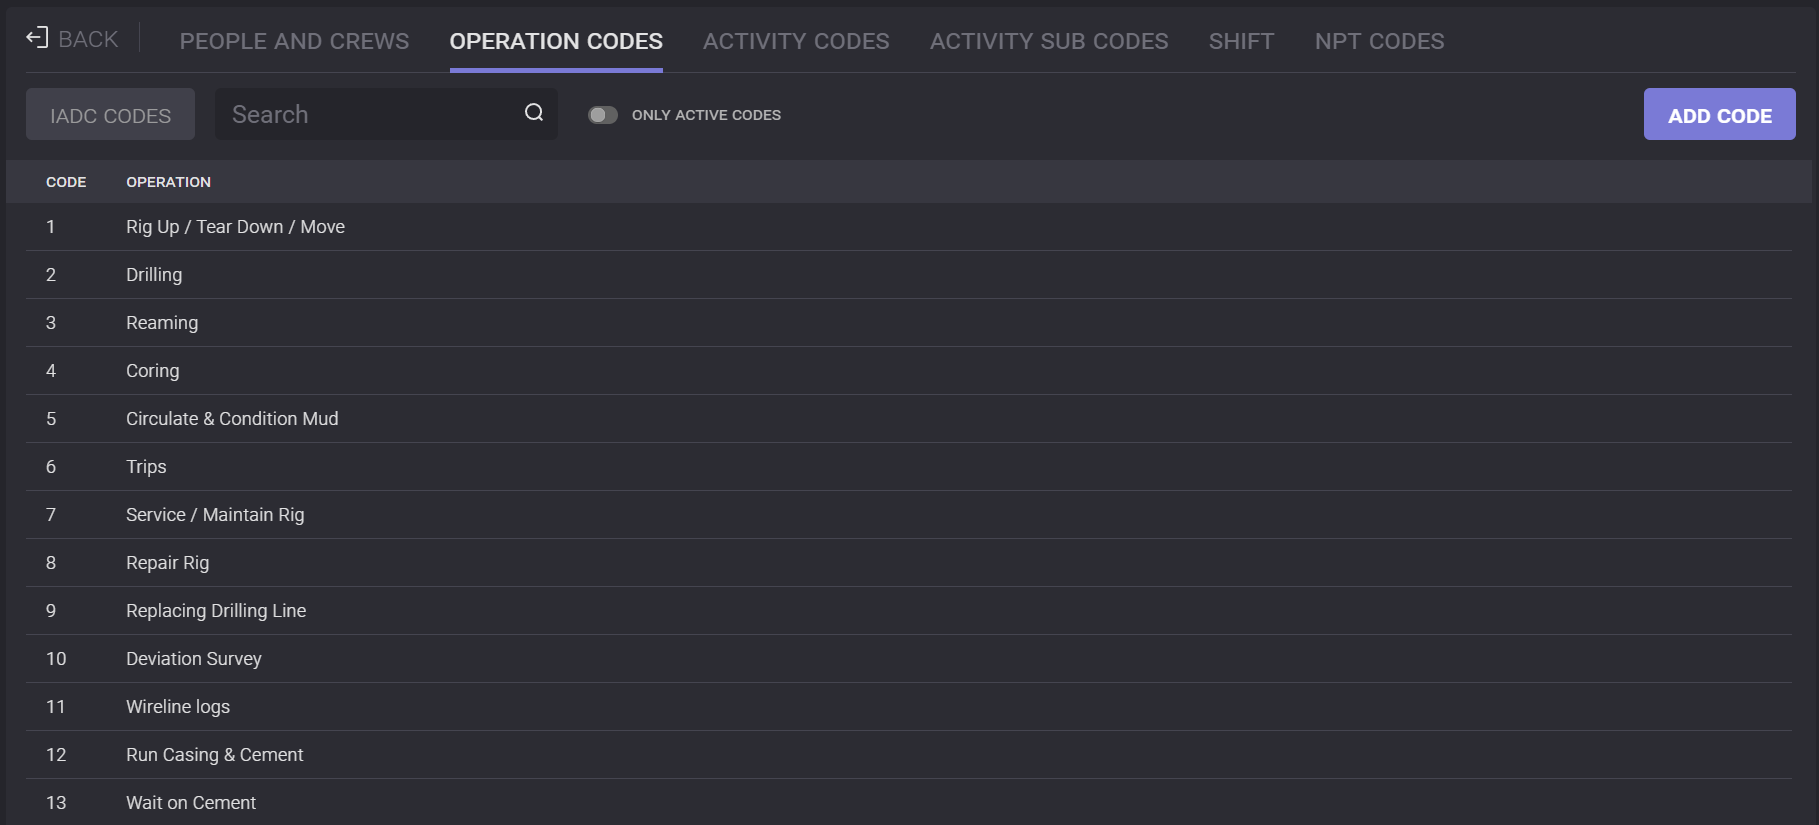
To find the code in the list put the cursor in the search field and enter the query. The list will be sorted with results that correspond to the entered query.
Activity Codes
Activity codes can be viewed and managed in the DDR settings. To create the code click on the Add Activity button on the Activity Codes tab of the DDR settings. The activity can be changed by clicking on the Edit button in the table.
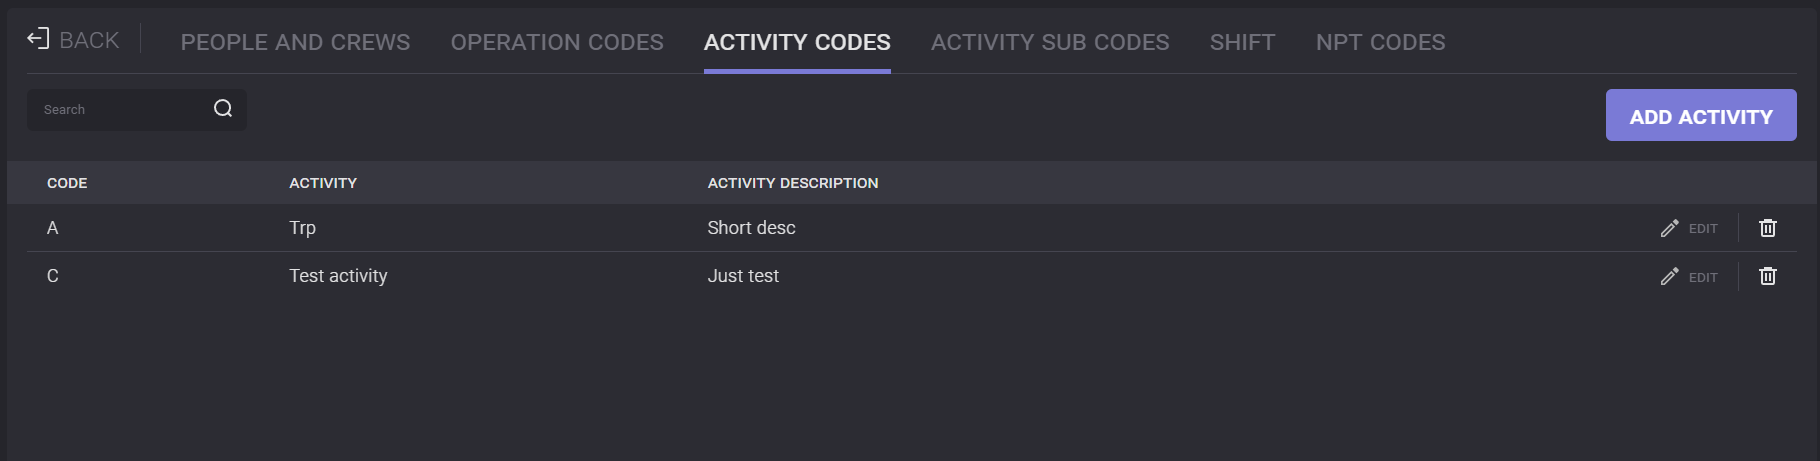
To remove the activity code from the list click on the Delete icon next to it .
To find the activity in the list put the cursor in the search field and enter the query. The list will be sorted with results that correspond to the entered query.
Activity Sub Codes
Activity Sub codes can be viewed and managed in the DDR settings. To create the code, click on the Add Activity button on the Activity Sub Codes tab of the DDR settings. The activity can be changed by clicking on the Edit button in the table.

To remove the activity code from the list click on the Delete icon next to it .
To find the activity in the list put the cursor in the search field and enter the query. The list will be sorted with results that correspond to the entered query.
Shift
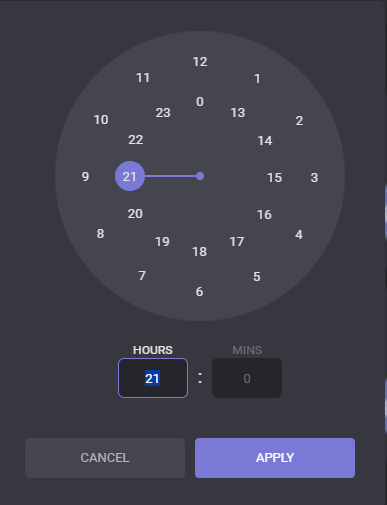
On the Shift tab can be specified shifts time range. To select the start time or the end time of the shift, click on the time field. On the opened clocks, set the hours, minutes, and part of the day and click the Apply button.
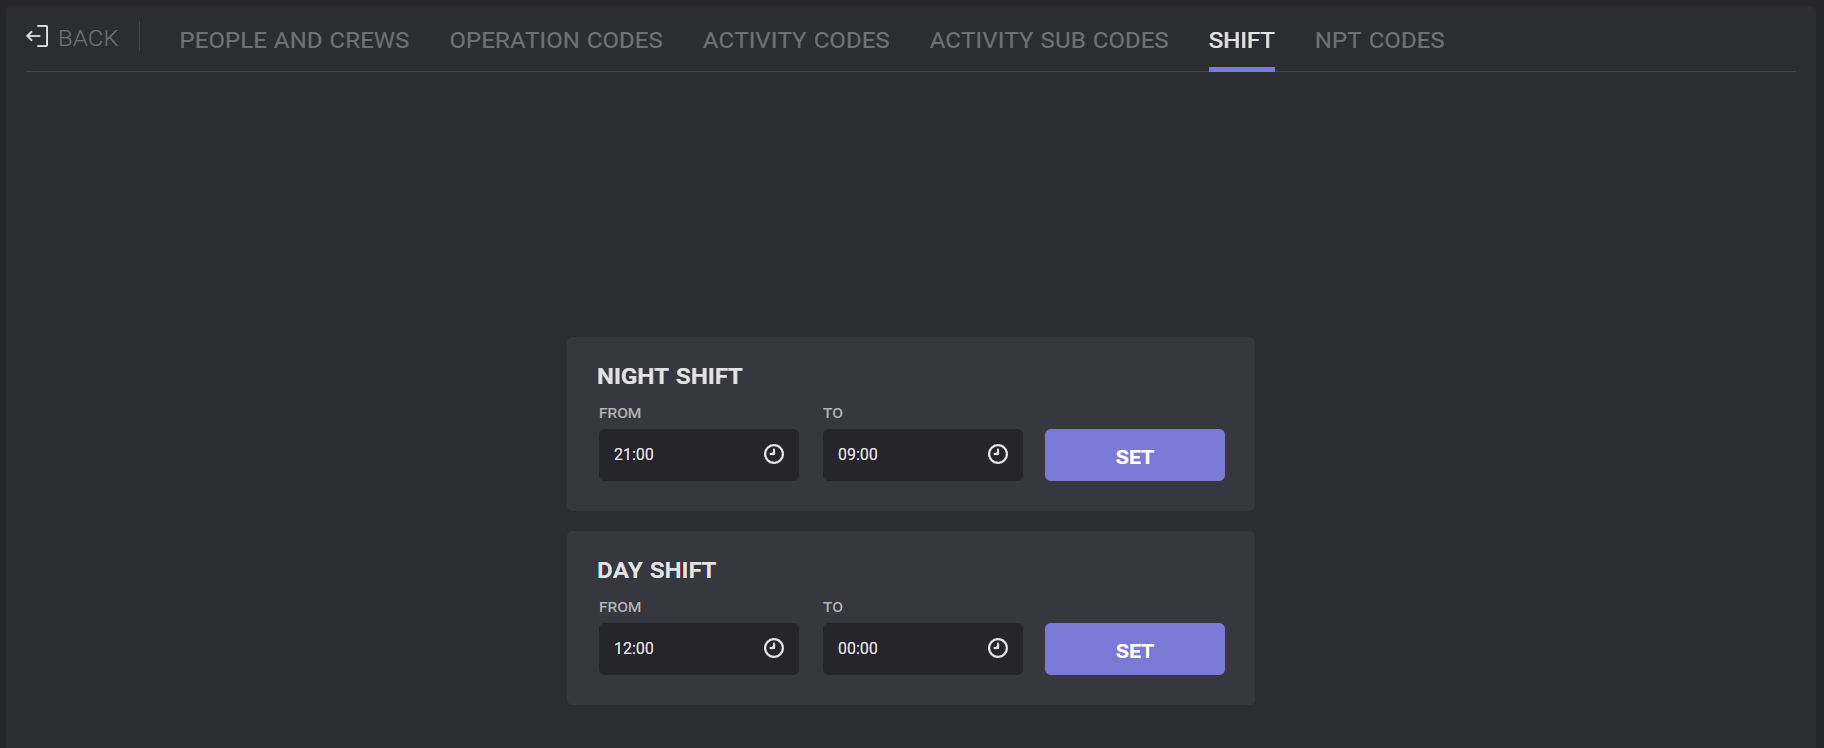
When the time ranges for shifts are selected click on the SET button to save the Shift settings.
Note: if the total period exceeds 24 hours the last shift will be colored with red
NPT Codes
NPT Types
Non-Productive Time (NPT) Type can be viewed and managed in the DDR settings. To create the code, click on the Add Code button on the NPT Type tab of the DDR settings. The NPT can be changed by clicking on the Edit button in the table.
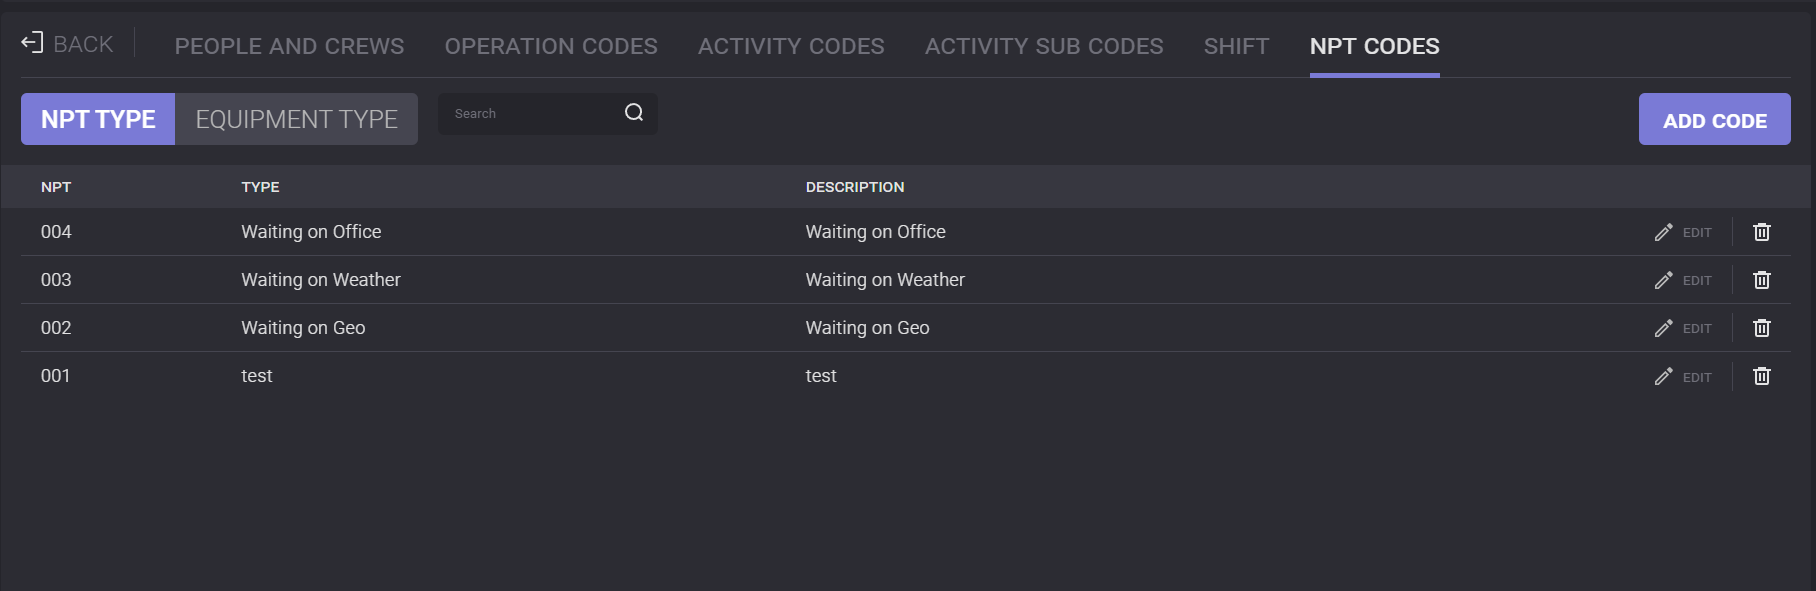
To remove the NPT type from the list click on the Delete icon next to it .
To find the NPT type in the list put the cursor in the search field and enter the query. The list will be sorted with results that correspond to the entered query.
Equipment Type
All necessary components and equipment that will be used in the daily drilling reports can be added in the DDR settings on the Equipment Type tabs. To create a new component, click on the Add Code button and in the opened modal window, enter the component name. Components can be edited or deleted from the list.
